Howdy, readers! Today is the first day in the blogging series/linky "What Worked." For the next few weeks I'll be posting about the reflections and best practices I've had in the classroom this year. It is also open for other bloggers to share their posts on each topic, so be sure to check out the other posts at the end! I can't wait to read what everyone else has posted so I can continue to improve my instruction year to year.
Today being the first day, I am here to bring you what worked in the area of Science Notebooks! MY FAVORITE!!!
Let me begin by making a few important points:
1) I did not create everything that went into the Science Notebook. I used many different resources to make sure my students had a lot of variety, which is something that definitely WORKED! Underneath each picture there's a link to the location in which the resource can be found.
2) I did not take a picture of every single page in the notebook. We would be here all day, people. I tried to get a picture of a lot of different types of resources used, so you can see the variety. Most often, I used a resource type more than once for each unit of study.
3) The photos are taken from student notebooks, so they are created and loved by kids. The key for me was that students needed to be neat, but that ultimately it is THEIR notebook. Often you will see doodles and decorations, which I would like to point out was something that WORKED! My students had ownership of their notebook. They loved their notebook. And when I said, we're going to do a Science Notebook activity, I got actual cheers of excitement! :)
Let's get started!
Let's talk about the notebook itself. These are the 1 subject spiral notebooks from Target (the Up and Up brand). My county was lucky enough to have a TON of these donated to us by our local Target, so I used them for our Science notebooks.
WHAT WORKED:
1) The plastic cover was super durable. This picture was taken this week after an entire year of using them!
2) There is a cardboard pocket inside before the first page which was wonderful for those times where we didn't get to finish something and had to store it for later. It also worked well for student make-up work if they were absent. If a student was absent, I just slid in what we did into the pocket for them to make-up later!
The cover page is part of a great freebie from
Not So Wimpy Teacher, which is where I also got their Table of Contents pages. Click
HERE to download it.
I printed one out for each kiddo, we trimmed them, colored them, and then I used packing tape to secure it all the way on. It makes it look like the whole front is laminated.
Here's a picture of one of the Table of Contents pages. This is also in the freebie offered by
Not So Wimpy Teacher. We made sure to update our Table of Contents each time we did an activity and the kiddos labeled each page to match the page number.
NOTE:
Some activities took more than one notebook page, but to save space on our Table of Contents, students got in the habit of labeling each page for the activity the same page number if it had more than one so we didn't have to keep writing the same activity over and over again in the contents. For example, the Rocks Science Spin was a two page notebook activity, so both pages were labeled with a 23.
RESOURCE LOCATION #1:
I found this little dude in the Second Grade AIMS Life Science book which we have available to us at our school. I found a lot of printable resources from that book that went well with hands on experiments as well.
WHAT WORKED:
1) These types of activities where students can flip open flaps and see what's underneath were a HUGE hit with my kiddos. This was one of the first activities we did at the beginning of the year and I still catch some students going back to look at it and lift the flaps. It was highly engaging and still is!
2) This was a FREE resource for me. I just went to the school's resource room, found the book, and made some copies.
RESOURCE LOCATION #2:
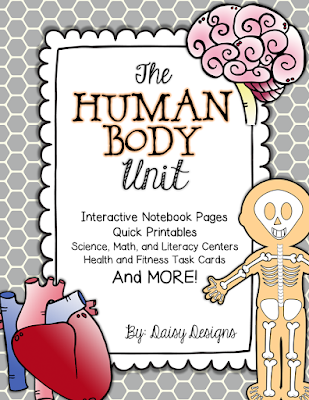
I created this one myself after I found that there were not that many Second Grade notebook resources for the Human Body unit. This foldable is part of my Human Body Unit, which you can find
HERE or by clicking the image below. This is just one of MANY foldables included in it which are suitable for primary kiddos.
WHAT WORKED:
1) Colored paper RULES. Unfortunately I didn't have much of a budget for colored paper and I was not able to spend a ton of my own money on colored paper, but when I did, BOY HOWDY, it made a big difference on the level of engagement and excitement from my kiddos. The colored paper makes it eye popping.
2) Flip flaps are a total win. Similar to the human body dude above, the students love to go back and flip these open which is practicing on their own (can you say, every teacher's dream??)
RESOURCE #3:
This is actually from a product on TPT that is advertised as a lapbook activity. Instead of creating a lapbook, however, I picked out the activities I thought would be best for my class's needs and we put them in our notebook instead! So if you ever see a great lapbook activity on TPT but don't think you'll have the time to complete each piece with your class, don't disregard it! It still has tons of interactive activities that will go great in a notebook! This specific activity is from the
Butterfly Life Cycle Lapbook by Mrs. D's Corner.
WHAT WORKED:
1) I used the activities that worked for my class, but didn't feel obligated to use up my file folders and copies on every page that didn't fit into our schedule. It's a win-win! I also still have the file in the event that one year, I may want to do the lapbook! Who knows?
2) Lapbook files tend to have a LOT of different styles of foldables and activities because when you put them together into the file folder, you want them to look snazzy and exciting. That means that although we are working on the same unit of study, the kiddos have a lot of varying types of activities and foldables. Happy kiddos!
RESOURCE #4:
Sometimes the plain ole worksheet will make it's appearance into the notebook. A lot of times, I'm able to find these in free downloads on TPT, on Pinterest, or even just Google Images! I tended to use things like this when time was limited, there was a substitute, or when I was running out of copies for the month! This specific worksheet was also included in the
Butterfly Life Cycle Lapbook by Mrs. D's Corner.
WHAT WORKED:
1) Quick and easy!
2) Depending on the worksheet, they were just as engaging as the flip flaps but they took less time to construct. Again, varying the type of activity made a world of difference for my kiddos this year.
RESOURCE #5:
This was a freebie I found on TPT of an emergent reader/mini-book. It is offered for free by First Grade Schoolhouse. Click
HERE to download.
WHAT WORKED:
1) With the printable half page books like this, you can fit a lot into one notebook page. This little booklet has 5 pages fit into one stapled booklet. That's a lot of information at the students' fingertips but without wasting several pages of our Science Notebook.
2) This kind of mini-book has lines for students to write in what is happening in each illustration. This kind lends itself well for students to make connections and become the author of their Science Notebook. This was a great formative assessment tool for me to make sure the students understood the steps in the life cycle.
RESOURCE #5:
This is also from an AIMS Science book found at my school. These are little foldable mini-books full of information. I just snagged a box of envelopes at the dollar store, we glued them in, and VOILA! A little book pocket! It isn't pictured, but we worked on highlighting key details inside the mini-book and on the page next to the book, we wrote the facts we learned from it.
WHAT WORKED:
1) Variety, variety, variety!
2) The students really liked decorating their envelopes and typically decorated them to match the topic we were working on. This student drew the ground with little pea plants coming up!
3) These helped me integrate ELA by highlighting key details and summarizing the facts on the other side.
RESOURCE #6:
I am lucky enough to have a school that subscribes to Scholastic News and Science Spin. They don't always match the unit we are studying, but sometimes they do! We read them, do the fun activities, and then we chop them up and make our "own" magazine page! This one pictured above is from Rocks That Rock Science Spin. We cut out each paragraph and each picture to match and glued them in!
WHAT WORKED:
1) Very colorful and exciting to see in the notebooks. I already mentioned that COLOR makes a big difference!
2) This was a resource literally delivered to my classroom door. Not every school subscribes to this, but if you are able to speak with someone at your school or to get any sort of grant for it, try! It is an awesome resource and you get TONS of them throughout the year. There's also interactive games and vocabulary on the website that we use on the Smart Board as we read along.
RESOURCE #7:
Dirt?! That's right. We were studying rocks and soil and my students brought soil in from their backyards. I have found that if it is something that is small or flat, why not put it in? My students freaked out excitedly to get this taped in!
WHAT WORKED:
1) Well, it's dirt. It's free. It's easy to find.
2) There was an awesome shock factor involved with this. The kids were blown away that I actually had them tape their dirt into their notebook! NOTE: You'll definitely want to use packing tape on this...
RESOURCE #8:
Readworks.org is an amazing place to get reading passages! I use that site ALL THE TIME! Not all the passages are as awesome as this one with the chart to glue in, but many are. They have all subjects and all grade levels. I chose this one to share on the blog because it has the awesome chart as well as bolded words (yay text features!) and helped a lot with vocabulary. Not pictured are the comprehension questions included. After each passage on
Readworks.org, there are comprehension questions! By the way... this is a FREE resource!
WHAT WORKED:
1) The website let me select the passages based on my students' needs. There are all different reading levels and the variety is amazing.
2) There are paired passages also on
Readworks.org. There was another article "paired" with this one that allowed us later to compare and contrast.
3) The comprehension questions are already there and done for you. Just print and go! Sometimes I put these in their notebooks, other times I used them as quizzes or assessments. The possibilities are endless.
RESOURCE #9:
This was one of those ideas I had late into the year that I wish I had thought of AGES ago! I received a ton of those manila library book pocket things and wanted to use them somehow in our Science Notebooks. I had the students glue two of them in, fold the tops down and we created pockets for vocabulary flash cards and definitions. I used these in a lot of different ways. The first day I introduced the unit, we cut our cards and set up the page. Then we watched a video on BrainPop Jr. While we watched the video, we paid attention and listened for the vocabulary words they talked about. For example, if the video told us what "liquid" was, we put the card into our little stack. Usually, BrainPop Jr. talked about about 75% of the words in our pile. It chunked the learning of the words into smaller sections so the words were not overwhelming. It also made the students really focus on what the video was saying. This page was also handy because throughout the unit, we used them to play a matching game, quizzed our partners on our vocabulary, and played a memory match game with them facing down.
WHAT WORKED:
1) High level of engagement, no matter what point in the unit you are in. Students were super focused on the video listening for each word. They were excited to match them up when they started to master the vocabulary and they LOVED playing memory match and using them as flashcards with their partners.
2) By focusing on a few words at a time, we chunked the list of vocabulary words to make it easier to learn and less overwhelming.
So there ya have it! I hope these help you get prepared for next year. If you haven't been using Interactive Science Notebooks, what are you waiting for?! They are seriously a game changer.
Make sure you stop by next week for the next post in the "What Worked" series. Next week's topic is ELA Centers!
If you are interested in linking up your blog post about what worked with your Science Notebooks, please read the rules below and have fun!
RULES:
1) Must include the What Worked Schedule in each post that links back to Daisy Designs.
2) Links MUST be to BLOG POSTS relating to the topic of each week. NO PRODUCT LINKS. Product links and photos are totally okay within your blog post, but not as a link in the linky.
3) Check out the other bloggers' posts and comment on the one posted before yours.
And here are the images to get you started for next week! Thanks for stopping by!